To access the shopping cart, click the shopping cart icon ![]() or from the toolbar click Inventory>Orders>Shopping Cart
or from the toolbar click Inventory>Orders>Shopping Cart

There are three ways to fill the Shopping Cart. You can use one, or all three methods as needed. If you start with one method, you can add items with other methods if you want. The three methods are: Fill Icon (suggested order), Fill from Requisition (based on recipe requirements), and Add from the button (manually generated order).
1. To add items using the Fill Icon, click the fill button at the top of the screen ![]() .
.
2. To add Items from a Requisition, close the Shopping Cart. Go to Requisitions and create the list. When finished, click the “Add To Shopping Cart” while in the Requisitions Screen.
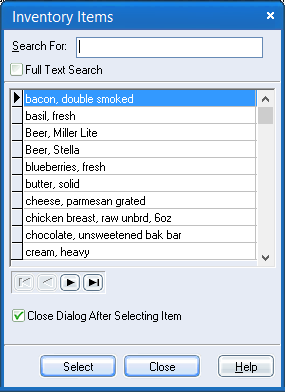
3. The last method to add Items is to click the “+” button at the bottom of the Screen. The Inventory Item popup will appear. Use your mouse or the scroll bar to find the Inventory Item you wish to order. Make sure that the arrow is to the left of the item. Click Select. Tab over the Quantity column and type in the amount needed.
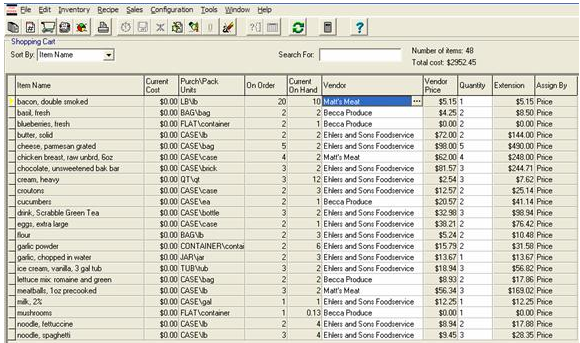
Enter or change an item quantity in the “Quantity” column. The default unit will be listed first in CAPS. Enter the default quantity and separate it from the secondary count unit with a slash.
Delete an item by clicking the “-” button on the bottom of the screen. To clear all of the items, click the “Clear All” button.
![]()
As you look at the list, you may see the same Inventory Items listed twice, with different quantities. This occurs because the Shopping Cart gets information from both the Par Levels and Requisitions screens.
Because you can send Requisitions to the Shopping Cart, and also have CostGuard suggest an order quantity, each can include the same item. When you are finished with the Shopping Cart, CostGuard will combine the Inventory Items in the Order Screen. You can adjust the totals if needed.
If inventory items are missing a Vendor, click the “Assign Vendors” button at the bottom of the screen. Costguard will assign vendors based on the vendor you picked when you originally created the item. To change the vendor, highlight the vendor field for the selected item, click the three dots, and choose another vendor.
![]()
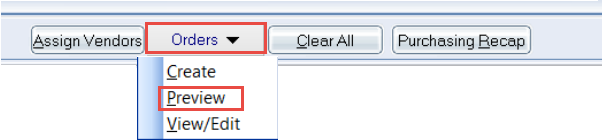
To preview your order, click “Orders” at the bottom of the screen and select “Preview” from the dropdown list. Your order will appear at the bottom of the screen. Make any changes that are necessary including quantity and vendor.

When your order is ready, click the “Create” button from the dropdown “Orders” button.

Viewing Purchase Orders
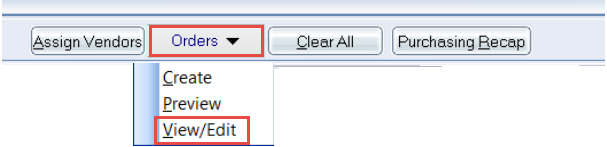
To view your Purchase Order, click “Orders” at the bottom of the screen and select “View/Edit”
A screen with your purchase orders will pop up. Click on the purchase order you would like to view so it is highlighted and click “select”.
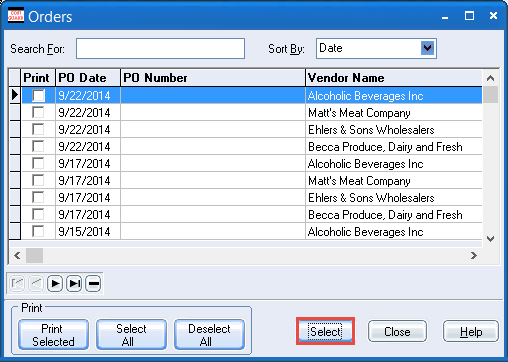
Your selected purchase order will appear on the following screen
