Tips
If you use spreadsheets for your counts, then this will import the counts to CostGuard. Using this feature is faster than re-entering them into the program.
If you own a Liquor Control systems, or you have your counts on a spreadsheet or in a text file, then the Liquor Control Interface will import them into CostGuard. When you use this interface, you avoid typing them into CostGuard, and it will help avoid typing errors. This feature will import your counts with just a couple of clicks. Please visit our web page for the current list of Liquor Control interfaces.
This feature works in the Demo Mode and in the SAMP unit. You must use one of the CostGuard Standard Text formats and you cannot change the name or the layout of the data. This is a great place to try this feature.
If you have your counts on a spreadsheet, before importing open up the spreadsheet. CostGuard will only convert one worksheet at a time. The first column should be the location. The second column is the item name, and the third column is the quantity on hand. You can use the first row as a heading. Delete any unused inventory items. Delete any internal subheadings and blank lines. To preserve your original formatting, save the edited spreadsheet with a new name. Close the spreadsheet.
If your counts are in a Text format, make sure it is a comma-deliminated format. Put “ “ around words, and separate each field with a comma. The fields must be in this order: location, item name, quantity. For example:
"Storeroom","croutons",3
"Storeroom","cucumbers",4
This is the CostGuard Standard (Text) format. Using this format will ensure that the data transfers properly.
If you are using the Accubar system, then
you can optionally export the Inventory Items first. Go to
the Liquor Control Interface and then click the ![]() button.
This will create a file with all of your Inventory items. Follow
the directions from Accubar to open this file and import the Inventory
to their program.
button.
This will create a file with all of your Inventory items. Follow
the directions from Accubar to open this file and import the Inventory
to their program.
To Import Counts
1. Follow the directions from your Liquor Control Systems and complete a count. Make sure you save the file with the count information. You will need to import this file, so it must be available either on your PC or on your network.
Make sure you follow their directions for how to count the liquor.
2. If you are using Spreadsheets or a text format, go and do the count. Record the information on the spreadsheet or the word file. Save the file.
3. Open CostGuard. Click Inventory, Counts, and then Liquor Control Interface.
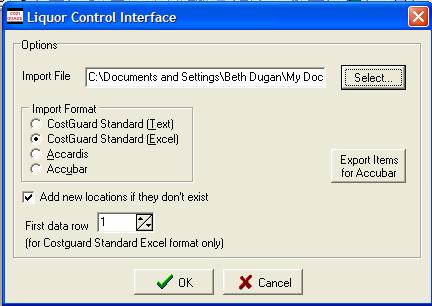
You will see the following popup.
4.
Click the ![]() button. Find the file with
your counts. When you find it, double click it.
button. Find the file with
your counts. When you find it, double click it.
5. Next, click the button in front of the file format. You can only choose one type.
Clicking CostGuard Standard (Text) means that you are using a comma delimited file in the proper format. Clicking CostGuard Standard (Excel) means that you have a spreadsheet file in the proper format. Clicking any other option means the file has been exported by that software.
6. Click the box in front of “Add new locations if they do not exist” if you want CostGuard to add locations.
When you check this box, CostGuard will automatically add new locations to the Count screens. If you do not want to add these locations, unclick the box, but you may have to return and import the items found in these locations. For more information on locations, click here.
7.
If you are using a spreadsheet, then move to the next box.
Use the ![]() and scroll up or down to find the first
row of data.
and scroll up or down to find the first
row of data.
You do not want CostGuard to import the headings, or the titles at the top of the columns in Excel. Set this to match the first row of data, so only data will be imported.
8. When you are finished, click OK to Import, click Cancel to cancel the transaction.
The screen will go blank for a moment as it imports the counts.
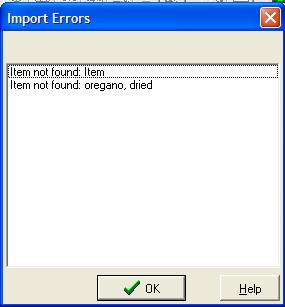
9. If there were any errors in the import, you will see the following popup. Click OK to acknowledge the errors.
CostGuard will not import these items. After you finish with the count, go back and add these items to your Inventory. Then, you will need to use the Count screen to enter the quanitites. For more information on the Count Screen, click here. For more information on adding an inventory item, click here.
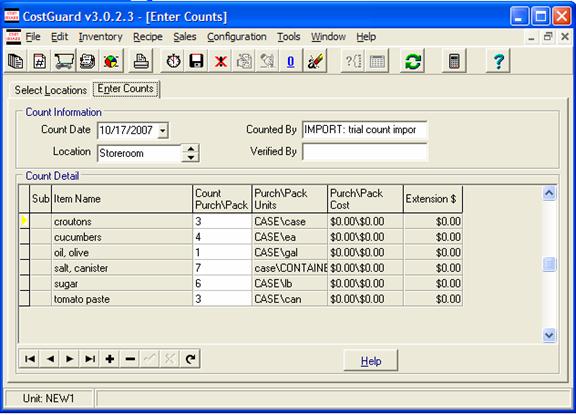
10. The CostGuard Count Screen will appear. Notice the file name is in the Counted by box. You can change or delete the counts on this screen.
If you would like more information on this screen, and what you can do with it, click here.
11.
When you are finished, click ![]() to save the
counts. If you do not click the save icon, the count will not save.
to save the
counts. If you do not click the save icon, the count will not save.
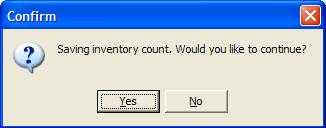
You will see a confirmation popup. Click Yes to save, No to abandon the changes.
12. If you need to edit or delete this count, then you must use the Edit/Delete Count screen.
Once you save a Count, it will update the items’ levels, and display on the appropriate reports. For more information on how Counts affect Reports, click here. Even after you save the Count you can still make changes. Use the Edit/Delete Counts screen to do that. For more information on that screen, click here.
To return to the Main count entrance for more information on using a Handheld for Counts, click here.