Tips
Suspended Receipts will not export: you need to save them first. One suggested routine is to print the receipt, save it, file the printed copy, and then export it to the Accounting Program. Since Exporting does not send all of the details to the Accounting program, the printed receipt and vendor invoice are your only hard copies of what you purchased.
If you purchased the optional Accounting Interface module, you can export invoices to a file. Then your Accounting program can import the file into its Accounts Payable (AP) database. Before you can use this feature, you need to setup the Interface. Click here to go to the setup program.
Before you can export the invoice, you need to create it by entering in a receipt. For more information on how to do this, click here. While it only takes a few minutes to export invoices, you may want to pick one day of the week to move all of the previous weeks receipts at one time. By picking a consistent day and time, you will minimize some common export issues such as double posting a receipt.
Remember that exporting the invoices is part one of the process. The second part is finished when you import the data into the accounting program. If this is the first time you are using the interface, you may want to create a dummy receipt in CostGuard. Use this dummy receipt to test the connections between the two programs, making modifications as needed. If you are having problems reading or mapping the file after importing, check your accounting program’s help files for information.
To Export Invoices
1. Click File, Click Accounting Export
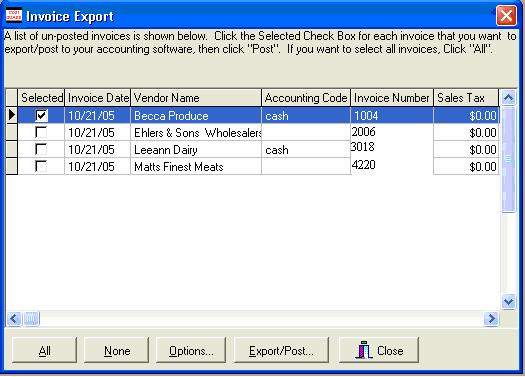
If you have invoices ready for exporting, they will appear on the popup. If you did not enter any receipts, this popup will be blank. Click Close to exit. Enter or save your Receipts and try again.
2.
Use your mouse or cursor to check the invoices that you want to
export. If you want to export all of them, click the ![]() button.
button.
If you click all, and change your mind,
click the ![]() button to cancel. You can then use
the mouse to select desired invoices. If you click more than one
invoice, be sure that your Accounting software can import more than one
invoice per file.
button to cancel. You can then use
the mouse to select desired invoices. If you click more than one
invoice, be sure that your Accounting software can import more than one
invoice per file.
3.
Clicking the ![]() button will return you to the
set-up menu. For more information on the Accounting setup program,
click here.
button will return you to the
set-up menu. For more information on the Accounting setup program,
click here.
4.
Click ![]() to post the invoices. A popup
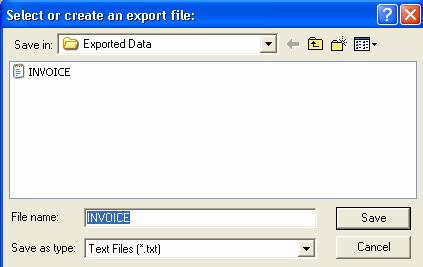
will appear to confirm the export file name.
to post the invoices. A popup
will appear to confirm the export file name.
This is the file entered in the Setup program. If needed, you can type in a new file name. Click Save when finished with this screen. If you changed the file name, a second popup will appear for confirmation. If the name is correct, click OK. If not, click cancel, and start the export again.
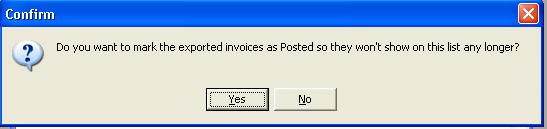
5. After exporting the file, another popup will appear. This popup asks about marking all exported invoices as posted.
Click yes to remove the invoices from the list. Click no, and they will remain on the Invoice popup menu. To avoid double posting the same invoice, you should click yes and remove them from the list.
6.
Click ![]() when finished. You will return
to CostGuard Main Screen.
when finished. You will return
to CostGuard Main Screen.
7. CostGuard exported the Vendor Name and number, Invoice Date, Invoice Number, Invoice, SuperGroups, Tax, and Freight Totals.
If you have issues with a specific invoice, fix it in the Accounting Program. For example, if you accidentally double posted an invoice, use their methods to fix the problem.
8. Minimize CostGuard, and open your Accounting Program. Follow their directions for importing files into the program.
If you have QuickBooks SDK file, you can skip this step, as CostGuard has already entered the invoices. When finished importing the file to your Accounting Program, close it, and return to CostGuard.
To return to Accounting Interface, click here.
To return to Receipts, click here.
To skip to the next section of the Inventory Tutorial, click here.
To continue to the next Optional Module, click here.