 Sales Entry – Using PLU NumbersSales Entry – Using PLU Numbers
CostGuard allows you to type in your Sales Data using PLUs. Use this if you do not want to connect CostGuard to your POS system, or if your cash register has a PLU printout for menu items. If you track sales with a check-off sheet or a “Z” report, this method will work as well.
Before you can start, you need to create a menu with all of your dishes included in CostGuard. For more information on how to do this, click here. You also need to create PLU for each dish. For more information on how to create PLU, click here. Once both are done, you can begin entering the Sales information.
1. Click Sales, click Sales Mix

2.
Click the  at the end of Menu Name. The
Menu pop-up screen will appear. Use the search function or the scroll
bar to find your menu. Make sure that the
at the end of Menu Name. The
Menu pop-up screen will appear. Use the search function or the scroll
bar to find your menu. Make sure that the  button
appears to the left of the menu. Click Select. All items attached
to this menu will appear in the bottom part of the screen.
button
appears to the left of the menu. Click Select. All items attached
to this menu will appear in the bottom part of the screen.
The fastest way to enter the Sales Data is to create a menu based on the meal period with all of the dishes included. For more information on menus, click here.
3.
Today’s Date is in the next field. If this is the date you
wish to use, then skip to the next step. If you need to change the
date, click the  arrow and the calendar pop-up menu
will appear.
arrow and the calendar pop-up menu
will appear.
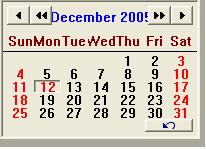
To change the date, use the  arrows
to change the Month and the Year. The single arrow will move forward
or backwards one month. The double arrow will move forward or backwards
one year. Use your cursor to change the date highlighted.
When finished with the date, click
arrows
to change the Month and the Year. The single arrow will move forward
or backwards one month. The double arrow will move forward or backwards
one year. Use your cursor to change the date highlighted.
When finished with the date, click  to change it.
If you want to enter Sales once a week or once a month, use the ending
date of the period for the date.
to change it.
If you want to enter Sales once a week or once a month, use the ending
date of the period for the date.
4. Use your cursor to move to the Comment field. Use this as a note to explain Sales Volume.
Some suggested notes includes holidays such as Valentines Day or New Years, weather related such as very snowy or rainy, or any other detail that will help explain unusual Sales for that day. You can leave this blank if desired.
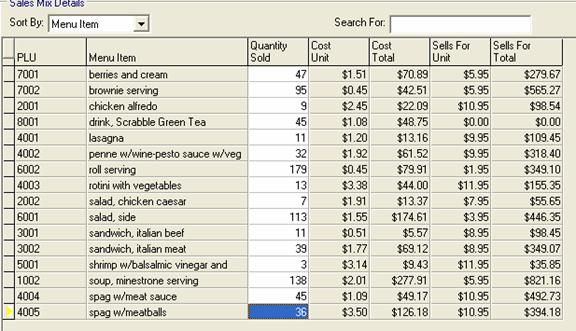
5. As you enter in the Sales below, the Total Quantity, Total Cost, Total Sales, and Total Food Cost Percentage will be calculated automatically.
For more information on how these fields are calculated, click here.
6. Start typing in the Quantity Sold for each item. Hit enter, and the cursor will move to the field below.
For faster entry, you can sort by Menu Item or
by PLU. Click the at the end of the Sort By
field. You can toggle between them as needed.
7.
When finished, double-check your information. Click  to Save.
After you hit Save, look at the bottom of the screen. CostGuard is going through each dish and depleting inventory used to make the Recipes. If you go back to Inventory Manager, the Quantity on Hand will reflect what was used. For more information on Depleting Inventory, click here.
8. You can enter Sales for another day, by clicking Sales, then Sales Mix again. If you are finished with this section, click here.
9. Now that the Sales information is in, you can run a report, or you can use the information to analyze your operations with the “Winners and Losers” Report.
Winners and Losers shows the popularity and profitablity of each dish. If you would like to read more about this, click here.