 Sales Entry - ManualSales Entry - Manual
Even if you do not own a POS system, CostGuard has an option to enter sales data to generate cost reports. You can enter the sales data over a range of dates, using the end date of the period for tracking purposes.
Why take the time to do this? By entering the dollar amounts in CostGuard, you can generate cost reports that compare actual to ideal which help you manage your business. CostGuard will create a simple report based on the Sales and Costs associated with this Super Group. While it may not be as detailed as entering Sales by PLU, it will give you a start with financial controls.
1. Click Sales, click Enter Sales Manually
2. The Manual Sales Pop-up window will appear.

3.
Click  at the end of Super Groups.
The Super Group pop-up menu appears. Use the Search for or scroll bar
to find the Super Group that you need. Make sure that the
at the end of Super Groups.
The Super Group pop-up menu appears. Use the Search for or scroll bar
to find the Super Group that you need. Make sure that the  is to the left of the Super Group that you want.
Click Select
is to the left of the Super Group that you want.
Click Select
If you would like more information on Super Groups click here.
4.
CostGuard will return to the Sales Entry pop-up. Click the
 button. A calendar screen appears with today’s date
depressed. If you want to use today’s date for the sales, click
the
button. A calendar screen appears with today’s date
depressed. If you want to use today’s date for the sales, click
the  arrow.
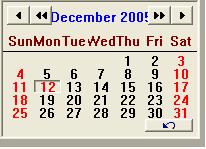
To change the date, use the  arrows
to change the Month and the Year. The single arrow will move forward
or backwards one month. The double arrow will move forward or backwards
one year. Use your cursor to change the date. Click the
to change the date.
arrows
to change the Month and the Year. The single arrow will move forward
or backwards one month. The double arrow will move forward or backwards
one year. Use your cursor to change the date. Click the
to change the date.
5. Move to Sales. Type in the dollar amount of sales for that Super Group.
If you click the at the end of
the field, a calculator will pop-up. Use it for your calculations,
and when you click the equal sign, the dollar amount will appear in the
Sales field.
6. When finished, click OK. If you do not want to save the sales, click Cancel.