 Spreadsheet Import Command: CG-XLSpreadsheet Import Command: CG-XL
This feature converts your Excel spreadsheets into Inventory Items, ready for use. You can use this feature to import data from any spreadsheet files that have Inventory Information such as your Accounting, Catering, or Nutrition programs. This feature will save you money and time. It will improve accuracy of your data, as you will avoid data entry errors.
Before converting, open up the spreadsheet. CostGuard will only convert one worksheet at a time. Make sure that your data is properly formatted, for example, numbers in numerical fields such as cost. Delete any unused inventory items. Delete any internal subheadings and blank lines. To preserve your original formatting, save the edited spreadsheet with a new name. Close the spreadsheet. CostGuard has included a blank worksheet called “CostGuard_Inventory_Template” in the Program File folder. It may be easier to open the Template and change the column names or carefully copy and paste your information to the template.
1.
Click Inventory, click Inventory Manager, click 
The Conversion pop-up box will appear.
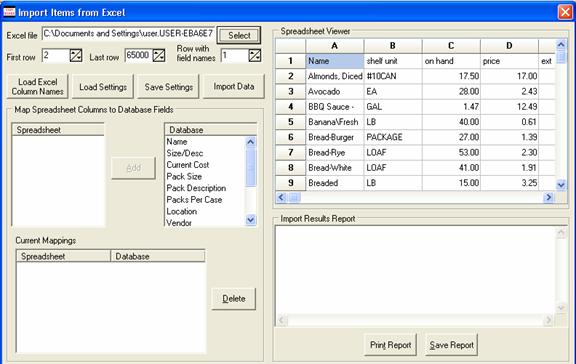
2. Use the mouse to move to the Excel file field. Click Select to find your first spreadsheet file. Highlight it and hit enter.
The spreadsheet will appear in the top right window. You can use the arrows to scroll through the spreadsheet as needed. You can look at the data, but cannot make any changes to it from this window.
3. Type in the first row and last row of data. Type in the Row number with the field names.
Field names are your column headings. CostGuard will use the information to match your column names to their database fields, and will ignore this row when importing.
4.
Click  button.
The left Column is the names from your spreadsheet. On the right side is the field name from CostGuard. If any of the names match, they will appear in the bottom Current Mappings window.
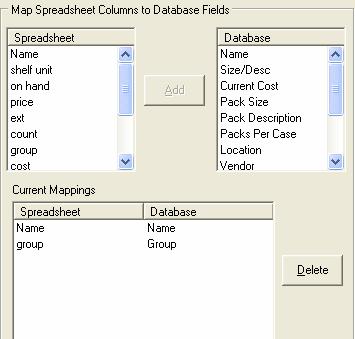
5. Now, you will match up your column names on the left with the database names on the right.
Highlight the name on left and then the matching
name on the right. Click Add to move it to the bottom. If
you make a mistake in the matching, use your mouse to move to the bottom
field. Highlight the mistake and click the  button.
6. Below is a description of the Database Fields, and their relationship to the Inventory fields. Since the Mapping “places” the information in CostGuard, match your column headings to the Descriptions.
Name: This is the name of the Inventory Item.
Size/Desc: This is how you purchase the Item, the “bigger” size such as Case.
Current Cost: This is the most recent cost for this item. This field must be a number such as 43.56 to work.
Pack Size: This is the “smaller” units within the Size/Desc. For example, using canned corn, the Size/Desc is Case the Pack Size is #10Can. For more information on Purchasing Units, click here.
Pack Description: This field describes the Pack Size. It may be the same as the Pack Size for most items. If you only have the one column in your spreadsheet, you will need to copy the information into a second column called Pack Description; this is a required field.
Packs per Case: This is the number of “Pack Size” per “Size/Desc” for this Inventory Item. Continuing with the canned corn example, if there are six cans of corn in a case, then a 6 would go here.
Location: This is where the Inventory Item is kept in your establishment. If you do not have this location set up in CostGuard, it will be created.
Vendor: This is who you normally purchase the Inventory Item from. If you do not have this Vendor set up in CostGuard, it will be created.
Item Code: This is the Vendor’s Item code for this Inventory Item.
Group: This is the Group, such as Dairy, Meat, or Produce for this Inventory Item. If you do not have this Group set up in CostGuard, it will be created.
Recipe Unit A separate part of the business with its own sales and costs.: This is the measurement that you usually use in Recipes for this Inventory Item. For example, canned corn is measured by the cup or scoop.
# per Pack: This is how many of the Recipe Unit is in the smaller or Pack Size. If you have cups as the Recipe Unit for Canned Corn, with 18 cups in a #10 can, then this field would have an 18. This field must be a number to work.
7. You must match up the following fields: Name, Pack Size, Pack Description, and Packs per Case.
Matching the other fields is optional, but the more you can match, the less editing you will need to do later on. If your spreadsheet does not include the optional matches, the conversion will still work.
8.
When you are finished matching the column names, if you have other
similar spreadsheets, click the  buttons. This
will save your map to convert column headings for the other spreadsheets.
buttons. This
will save your map to convert column headings for the other spreadsheets.
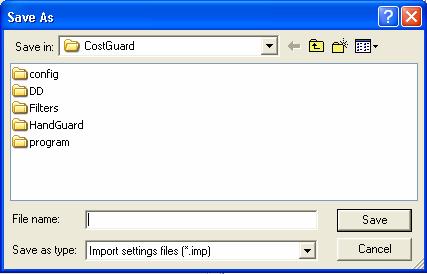
Another pop-up window will appear to save the settings. Type in a name – a suggestion would be Inventory matching names – and click save.
9.
After you are finished, click the  button.
CostGuard will now convert your spreadsheet data and add the items to
Inventory.
button.
CostGuard will now convert your spreadsheet data and add the items to
Inventory.
Depending on the size of the database, this may take a minute or two. You will have a progress popup showing how long it will take.
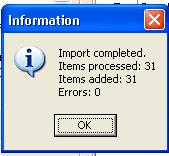
10. When the conversion is completed, a pop-up will appear. It will detail how many items were imported, and if any errors were present.
If you have an Inventory Item in CostGuard, with the same name, then CG-XL will not import the information for that item. It will only import items that are new to the Inventory database.
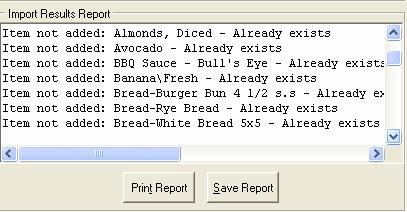
11. If there are errors, they will appear in the lower right window. The conversion program will not import or update identical Inventory items in CostGuard.
You can print the error report, or save it for future reference. Fix the errors, if needed and run the CG-XL again.
12. To close the Conversion module, click the red X.
If you have another spreadsheet to convert, start
again with Step 1. Open the spreadsheet, and type in the row information.
To load your mapping settings, click  button.
Highlight the next spreadsheet file name, and hit enter. If you
are emailing or copying the inventory spreadsheets to a disk, make sure
you send the import setting file as well, allowing the next user to easily
convert their data.
button.
Highlight the next spreadsheet file name, and hit enter. If you
are emailing or copying the inventory spreadsheets to a disk, make sure
you send the import setting file as well, allowing the next user to easily
convert their data.
13. When you are finished importing your Spreadsheets, take a moment to review what was imported. You may want to edit the Inventory Items and add information to the Locations and Vendors.
To look at the actual Inventory Items and edit them, click here. To edit and add information for the Vendors that were created, click here. To look at the locations that were created, click here. To look at the groups that were created, click here.
If you would like to return to the Enter a New Inventory Item, click here.
If you would like to continue in the tutorial, click here.