 Transfer
Module Transfer
Module
Transfer
Module Transfer
Module The Transfer Module is an optional add-on to the Multi-Unit Controller. The Transfer Module allows one unit A separate part of the business with its own sales and costs. to send Inventory products to another unit. This option subtracts the outgoing Inventory from the first unit and adds it to the second unit. With this feature, the perpetual inventories in both units are up-to-date, and the food cost calculations will be correct.
If you have more than one unit – why bother using this feature? Without it, you do not have any way of documenting the movement of product between units. In addition, without the documentation, a clever manager can move product between units artificially inflating and deflating food costs based upon their motives. Another advantage of the Transfer Module is you avoid having to adjust the product in the first unit, and receiving it in the second one. If you do not use the Transfer Module option, the first unit’s food cost will be too high, and the receiving unit will be too low, as the transfer is not accounted for within the system.
Transfers work best if the Inventory names match in both units. CostGuard can create the Inventory Item in the new unit. CostGuard allows you to transfer Prep Recipes and Finished Goods. When you transfer these items, they become Inventory Items in the Receiving Unit. You can move these Inventory items back into the Recipe section by using the item as an ingredient in recipes.
To Transfer Inventory Items to another unit
1. Click Inventory, Click Send Transfer
The transfer screen will appear.

2.
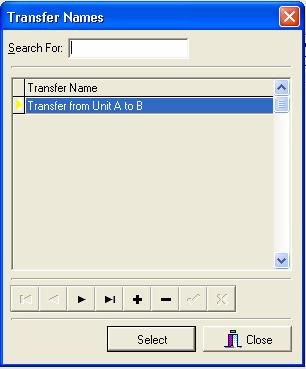
Click the  at the end of Transfer Names.
A pop-up menu for transfer names will appear. Highlight the name
and click Select.
at the end of Transfer Names.
A pop-up menu for transfer names will appear. Highlight the name
and click Select.
CostGuard tracks Transfers by name and number.
Using names that describe the transfer are a handy way to track them.
A suggestion is “Unit A name to Unit B name” and “Unit A name to Unit
C name” If you need to add a name, click the  button
to create one. When finished, click Select to save.
button
to create one. When finished, click Select to save.
3.
CostGuard will number all Transfers for Control purposes.
Use your mouse to move to the Receiving Unit field. Click the
 button for a list of Units. Highlight the
Receiving Unit and hit enter.
button for a list of Units. Highlight the
Receiving Unit and hit enter.
A receiving unit is required when you create a transfer. You cannot repeat transfer numbers.
4.
Use your mouse to move to the date field. Click the button to change the date if needed.
You can also fill in the “Fulfilled by” and “Comment” field, if desired.
5.
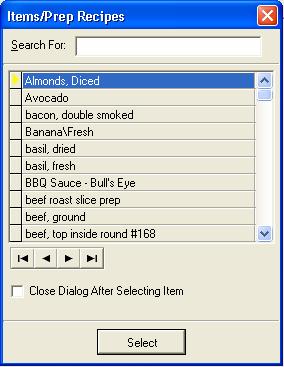
Move your mouse to the bottom window. Click the button at the bottom of the screen. Another pop-up
with all Inventory Items and Prep Recipes will appear.
Prep Recipes will transfer as Inventory Items
to the Receiving Unit. Use the search function, the scroll bars,
or the arrows to find the items that you want to transfer. To select
an item, make sure the  is to the left of the item,
and click Select. If desired, unclick the “Close Dialog after Selecting
Item” for faster selection.
is to the left of the item,
and click Select. If desired, unclick the “Close Dialog after Selecting
Item” for faster selection.
6.
If you have created transfers before, you can use the Fill command.
Click the  button to show the Fill pop-up menu.
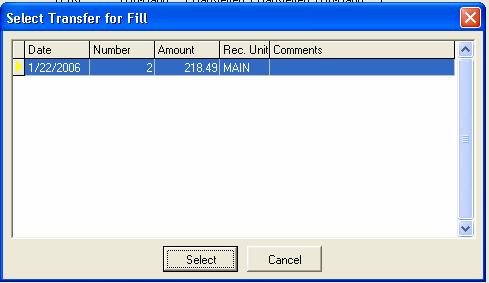
Use your mouse to highlight the transfer you
wish to copy. Make sure the is to the left.
Click Select, and the items from that transfer will appear in the main
window. Using a previous Transfer will save you time, as you do
not need to reenter all of the items. Use the Comment fields as
an explanation of what type of transfer that it is – for example, sending
daily entrees to the commissary.
7.
If you need to delete an item that you selected, make sure the
is to the left of the item and click  button.
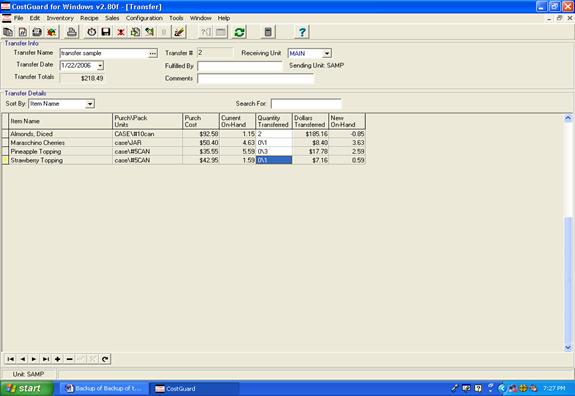
8. Enter the number of purchase or pack units in the Quantity Transferred field. For reference, CostGuard shows Current OnHand quantity.
As you enter in the cases, the Transfer Total in dollars will appear.
9.
Double-check your work when finished. Once you save a Transfer,
you can run a report, but cannot open the file. When finished, click
the  to Save the transfer.
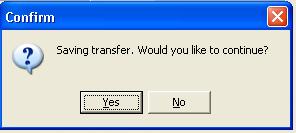
When prompted, click yes to continue or no to abandon the save and return to the transfer program.
10. As the Transfer program progress, a status bar will show on the bottom right. When finished, the following message will appear.
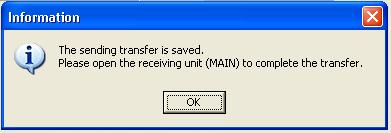
If you have further business in this unit, you may continue entering Transfers
and any other transactions. When finished, exit this unit and open
up the receiving unit to finish the transaction.
11. Saved Transfers appear on the Actual and Ideal Inventory Usage Reports. If you need to check how much, and what items were transferred on a particular day, use those reports to find the information.
For more information on the Usage Reports, click here.
12. For information on how to receive a transfer, click here.