 Groups SetupGroups Setup
Groups are a subset of SuperGroups. Use Groups to combine similar items within a SuperGroup for your establishment. For example, if you have a Super Group named Food, then possible Groups include cheeses, dairy, beef, pork, chicken, frozen vegetables and so on. If you have a SuperGroup named liquor, then Groups could include bottled beer, gins, whiskeys, and red wines.
If you have expensive items (Ingredients that they will keep a close eye on.), use Groups to keep track of them. For example, if you buy beef ribeyes as a whole piece; track them with their own Group. Then, as you cut the meat, the product remains within the group so you can track it through the establishment.
You can use groups for “prepared items” such as a finished ranch dressing that you make in your shop. You can setup a tax group to pay your taxes as needed. You can even create Groups that match rooms in your establishment, such as Men’s Room, Ladies Room, and Employee Break Room, to track expenses by those locations.
To setup Groups
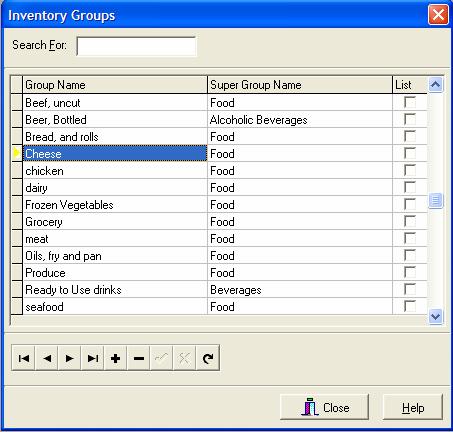
1. Click Inventory, Click Setup, Click Groups
2.
Click the  sign at the bottom of the
screen
sign at the bottom of the
screen
3.
Type in the name of the group next to the  icon.
icon.
4.
Use your mouse to move to the SuperGroup Name field. Move
the cursor to the far right side of the field and the  will
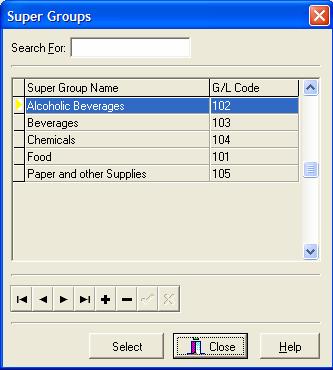
appear. Click it to bring up the SuperGroup List.
will
appear. Click it to bring up the SuperGroup List.
The SuperGroup popup will appear. Use your mouse to pick the SuperGroup and click Select. You can only choose one SuperGroup here, but each SuperGroup can have many different Groups associated with them.
5. You will return to the first screen. If you want the Inventory Items in this Group to print out when you do Inventory, click the List Box.
When you click the List box, the Inventory Items will print on a Count Sheet. If this is a Group that you do not need to count, then leave it blank.
6. Click on the  to
save the group.
to
save the group.
7. Keep
clicking the and to add more
groups.
8. To
delete a Group, move your cursor so that the  is to
the left of the Group name. Click the
is to
the left of the Group name. Click the  to delete.
A popup will appear to confirm. Click Yes to Delete, click No to
cancel.
to delete.
A popup will appear to confirm. Click Yes to Delete, click No to
cancel.
If you accidentally delete a Group, you will need to re-enter it.
9. When finished, click Close to end.
10. To see a list of SuperGroups that you have entered into CostGuard, click Inventory, click Reports, click the button in front of Group/SuperGroup List.
A list of the SuperGroups and their associated Groups will appear. You can print this sheet for cross-referencing. For more information on the List Reports, click here.
To continue with the tutorial and go to Locations click here.