User VendorTransport to enter initial data from your vendor. The first time you upload a file you will be able to add many basic fields for your inventory items.
On subsequent uploads, once your inventory items already exist, VendorTransport will only update the bid price.
For Your Vendor
If your vendor needs instructions for creating an Excel file, or needs to understand our fields please send them this link to the CostGuard Supplier Interface Specification.
Importing Your Data
If this is the first time you will be entering inventory items:
please familiarize yourself with the Inventory screens.
If you are already familiar with entering inventory:
Click on Inventory/Inventory Manager.
Click on the link at the bottom of the page that says VendorTransport.

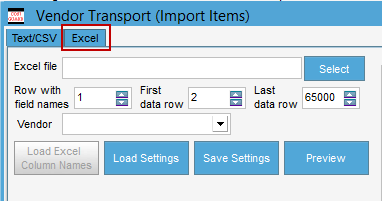
Click on the Excel tab.
View a tutorial of this import process.
Labeling your Excel fields
When you are ready to import, the easiest way to do this is to label your Excel fields with the same names that CostGuard uses in the database. If your Vendor can do this for you great! If not you can do it.
Here is a link to an Excel Template with matching field names:
VendorTransport Template
Here is what it should look like:

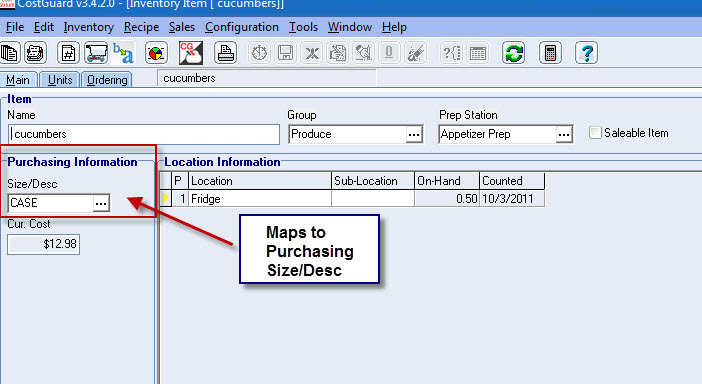
Matching the fields from your Excel file to the CostGuard Inventory screen
Here is another way to understand how the fields match.
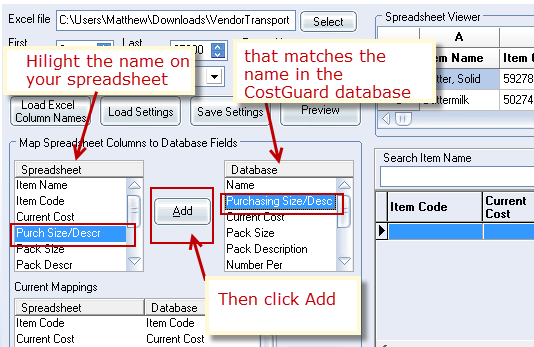
The fields named Purchasing Size/Desc match this CostGuard Field:
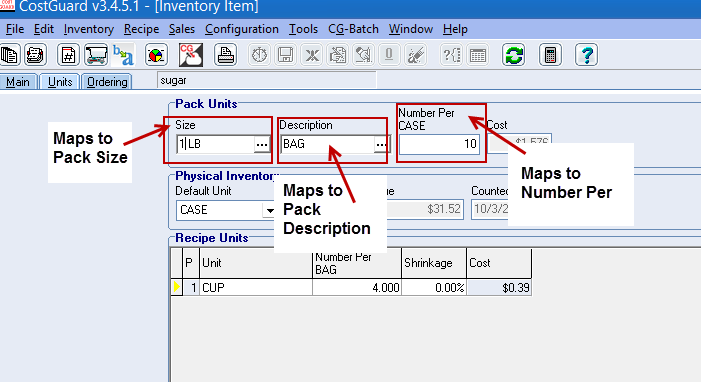
The fields named Pack Size, Pack Description and Number per… match the following fields:
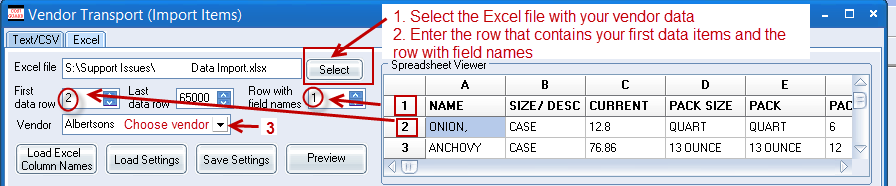
The Import Process
1.Select the Excel file you are importing
2.Enter the first row of data and the row containing the field names
3.Choose your vendor
Match and Map the fields from your spreadsheet to the fields in the CostGuard Database
—————————
Click Load Column Names. This brings in the column names on your Excel Spreadsheet.

—————————
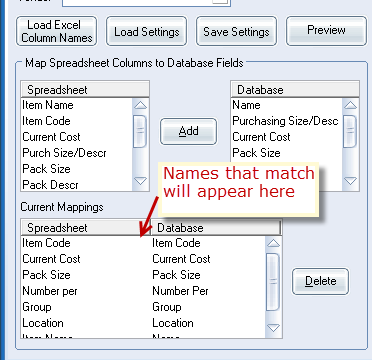
Any names that match exactly will display in the Current Mappings box.
—————————
To add field names highlight the field name in the Spreadsheet box, then highlight the matching name in the Database box
—————————
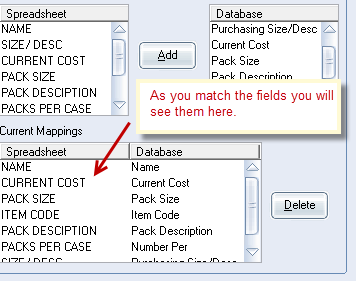
When your fields match you will see them all in box marked Current Mappings:
—————————
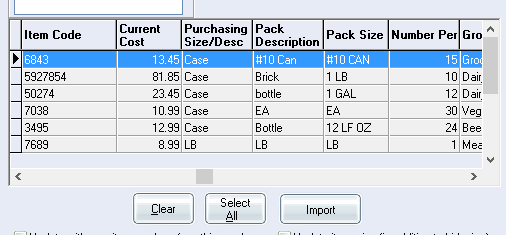
When you are done click Preview to insure that all your fields match correctly.
—————————
Once you are sure all your fields match save them for the next time you import from this Vendor

Importing
Import ONLY ONE item at first to test that you’ve done the process correctly. Check this item in Inventory to make sure that all the fields imported correctly.
