Before you get started, familiarize yourself with the fields in CostGuard’s Inventory module.
Click Inventory/Inventory Manager
At the bottom of the screen you will see a button for CG-XL

Take it slow!
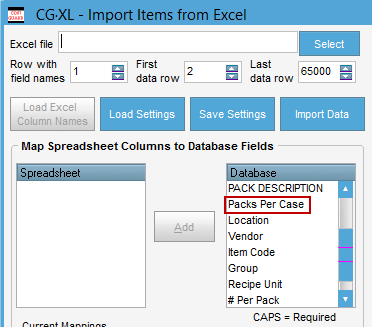
If you are using an earlier version of CostGuard (v.3.4) you may see different field names. Please check the CG-XL import to confirm which name you should use.
Earlier versions are labeled with Number Per:
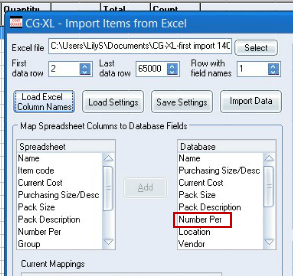
While later version are labeled Packs Per Case:
Create a test spreadsheet
When you are ready to import, the easiest way to do this is to label your Excel fields with the same names that CostGuard uses in the database.
Create a test spreadsheet with one or two of your inventory items using these headings.
(Remember, if you are using an earlier version of CostGuard column G below should read Number Per) 
**If you will be importing a spreadsheet with multiple workbooks you may need to separate each workbook into its own spreadsheet.
When you are satisfied with the results of the import then rename the fields in the full spreadsheet you would like to import. Add any fields that are missing.
Now do a full import.
Questions about mapping your fields to the CostGuard database fields? See these images:
Entering your data
Below are some examples of how data should be matched to fields.
(Remember, depending upon the version of CostGuard you are using column G should either be called Number Per or Packs Per Case. Name your according to what appears in CG-Cloud):

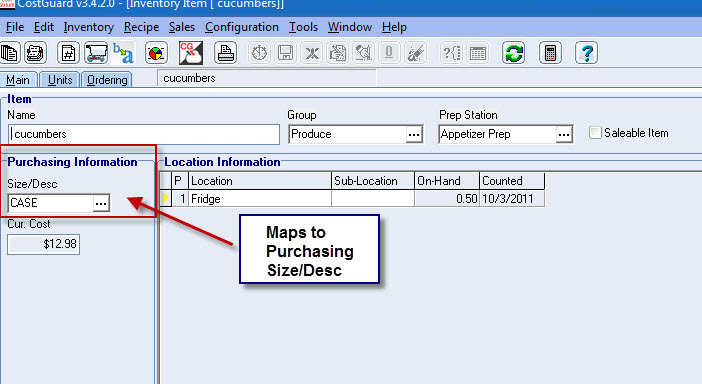
Matching the fields from your Excel file to the CostGuard Inventory screen
Here is another way to understand how the fields match.
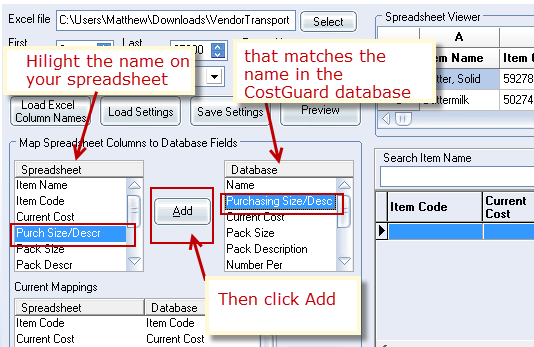
The fields named Purchasing Size/Desc match this CostGuard Field:
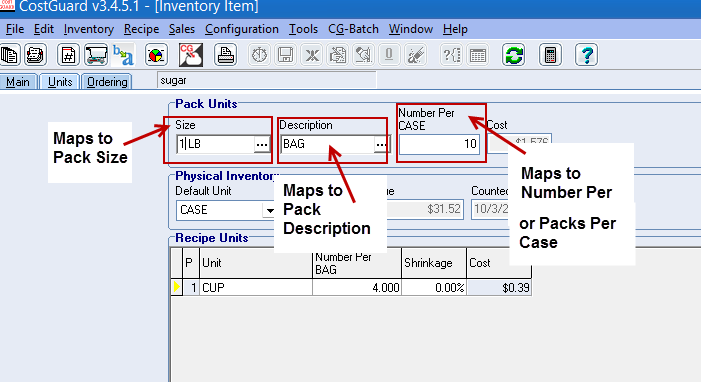
The fields named Pack Size, Pack Description and Number per/Packs Per Case… match the following fields:
The Import Process
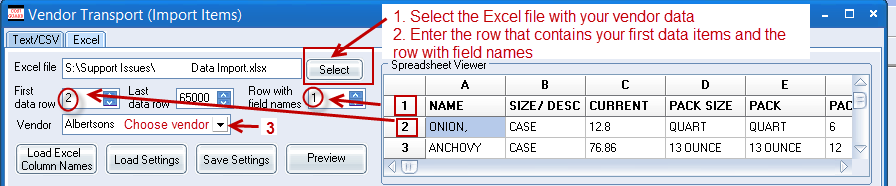
1.Select the Excel file you are importing
2.Enter the first row of data and the row containing the field names
(these screens show the VendorTransport import but they are the same for CG-XL)
Match and Map the fields from your spreadsheet to the fields in the CostGuard Database
—————————
Click Load Column Names. This brings in the column names on your Excel Spreadsheet.

—————————
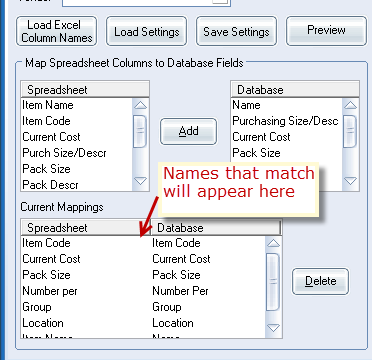
Any names that match exactly will display in the Current Mappings box.
—————————
To add field names highlight the field name in the Spreadsheet box, then highlight the matching name in the Database box
—————————
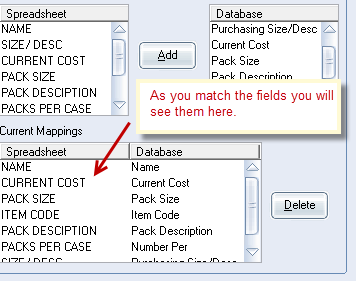
When your fields match you will see them all in box marked Current Mappings:
Click Import. After the import double check your items to insure that all fields were imported.
If you are not satisfied with the results and want to start over simply delete the inventory files. Click here for those directions