Tips
Create a few generic Requisition sheets, such as "Catering To Go Pack List" that can be used over and over to make sure that everything you need is pulled.
A Requisition is a named list of Inventory items that you want to track or keep together. Requisitions are a handy way of grouping items for a particular cost center such as moving items from a production kitchen to a retail outlet. Use Requisitions for tracking Inventory items for catering and banquets. You can use it to track supplies to a related department such as sending sugar to a bar. You can use Requisitions to create generic pull lists for day-to-day operations.
Requisitions are different from Transfers. Transfers are more suited for situations where you have independent units, and you need to track perpetual inventory between them. Transfers are a separate Module for establishments that have two or more independent operations that send Inventory Items back and forth between them. The Transfer Module will subtract the outgoing Inventory from the first site, and add it to the second site. Requisitions, on the other hand, simply subtract the outgoing inventory levels from the sending site. If you want a further explanation of the differences between Transfers and Requisitions, click here.
CostGuard has a great feature that will convert any number of recipes into a Requisition for your establishment. You can use this feature to create pull lists for daily prep sheets and production schedules based on the Recipes you selected. This feature will let you scale the recipes to match the number of customers, and then you can send the ingredients directly to a requisition. For more information on creating a Requisition from a Recipe, click here.
Once you create a Requisition, you can do several things with it. Creating a Requisition list is another way to Order items. If you order based on future customer counts and needs, instead of comparing counts to pars, you may want to use the Requisition feature. If you do catering, parties, or other events, then this is the method for you. With CostGuard, it doesn’t matter if you have one requisition per year, or hundreds in a week. With a Requisition, you can create and expand recipes, and then CostGuard assembles a list of Inventory Items based on the quantity needed. From the Requisition Screen, CostGuard will send the list to the Shopping Cart for Ordering. For more information on the Shopping Cart, click here.
You can print a Requisition and use it as a “pull sheet” for the day, or an event. You can use the totals to price a party. You can create a series of generic Requisitions for other outlets – such as a hotel bar, that they can use for Inventory and internal ordering. With Requisitions, if you need a list, this is the tool for you.
Requisitions will calculate a Cost of Food Sold for the list. When you are in the Requisition Screen, CostGuard will display the Current On Hand so you can tell if you have the item in stock or if it needs to be sent to the Shopping Cart for Ordering. Requisitions deplete Inventory levels, so once a list is generated and saved, CostGuard will remove those Inventory items from the Counts. If you are creating a generic list, or using the Requisition for pricing, suspend it, but do not save it.
CostGuard tracks and enters the Requisitions by name. Before you can create a Requisition, you must create a name for it. For more information on creating Requisitions Names, click here. If you want to see the current Requisition names that you have entered into CostGuard, click Inventory, click Reports, and click the button in front of Names. For more information on the Names List, click here.
To create a Requisition
1. Click Inventory, click Requisitions.
2.
Click on the ![]() next to Requisition Name.
next to Requisition Name.
3.
Scroll down to highlight the Requisition desired. Make sure
that the ![]() is to the left of the Requisition.
Click Select.
is to the left of the Requisition.
Click Select.
If you need to add another requisition
name, click the ![]() button that will bring you to the
Requisition Setup Screen. For more information on how to setup Requisition
Names, click here.
button that will bring you to the
Requisition Setup Screen. For more information on how to setup Requisition
Names, click here.
4. The Requisition number will appear automatically. Next, move your cursor to the Requisition Date and the Fulfilled date. Type in those dates.
The requisition date is the date that
this requisition was entered into CostGuard and requested for filling.
The Fulfilled date is the date that the items will be taken out of inventory
and made available for the employees. You can type in the date or
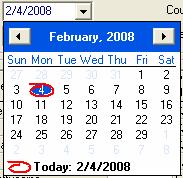
click the ![]() at the end of the date line. The date popup
will appear. Today’s date is blue with a red circle around it.
If you want today, then click the circle to enter it. To choose
another date in this month, then move your cursor to that date and click
on it. To go to a previous month, click
at the end of the date line. The date popup
will appear. Today’s date is blue with a red circle around it.
If you want today, then click the circle to enter it. To choose
another date in this month, then move your cursor to that date and click
on it. To go to a previous month, click ![]() button.
Keep clicking this button until you get to the month that you want. Today’s
date, or if you highlighted another date will still be blue in that previous
month. Find the date that you want and click on it. You can
use the
button.
Keep clicking this button until you get to the month that you want. Today’s
date, or if you highlighted another date will still be blue in that previous
month. Find the date that you want and click on it. You can
use the ![]() to move to months in the future.
to move to months in the future.
5. Finish filling in the Requisitioned by, Fulfilled by and comment section if needed.
You can track the employees who are requesting the items and who is fulfilling their orders.
6.
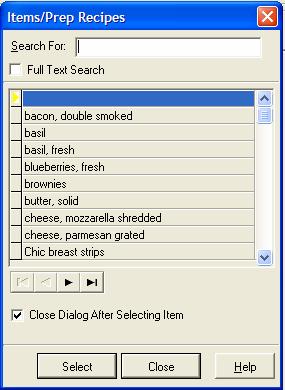
Tab down to the Item Name Field. Click the ![]() button to bring up a list of Inventory Items.
Scroll down or use the Search field to find the Inventory Item that you
want to send to the Requisition. Make sure that the
button to bring up a list of Inventory Items.
Scroll down or use the Search field to find the Inventory Item that you
want to send to the Requisition. Make sure that the ![]() is to the left of the Inventory Item. Click select.
is to the left of the Inventory Item. Click select.
All of the Inventory Items and Prep Recipes that you entered into CostGuard are in the popup. To save time, uncheck the box before “Close Dialog After Selecting Item” and the screen will stay at this popup, allowing you to choose multiple items. If you use the Search function, as you type in letters, the cursor will move to the first item that matches the letters. You can use the Search box, the scroll bar, or the directional arrows to find your Inventory Items. When you are finished with selecting Items, click close.
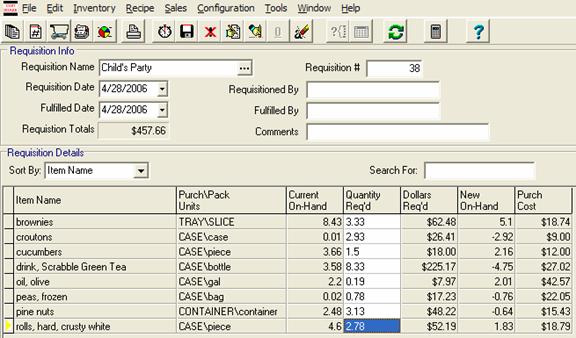
7. The Requisition screen will reappear; notice that the Purch\Pack Unit and the Current On-Hand will appear. Tab over to Quantity Adjusted field column.
Type in the Purch or Pack Unit amount that you want to requisition. If you used the Food List feature in Recipes to create the Requisition, CostGuard will fill this column for you. You can change the quantities from this screen if you like, especially if you want to send full unopened containers. Use your mouse or cursor to move to the field you want to change. Type in the new quantity and hit enter. For more information on creating a Requisition from Recipes, click here.
8. To enter in a quantity, use your mouse to move to the Quantity column.
Notice that both the Purch\Pack Units are listed. Back when you created each Inventory item, on the Unit Tab, you chose either the Purch Unit or Pack Unit as the default Physical Count Unit. The Default unit will be in all CAPS, while the other unit will be in lower case. Type in the Default Unit first followed by a slash and then the other unit. Looking at the example below, for Olive Oil the Default Unit is CASE while the second unit is gal. If you want to requisition 3 cases and 2 gallons of Olive Oil, you would enter 3/2 for the quantity. If you want to requisition only 3 gallons of Olive Oil, you would enter 0/3. If you need 3 cases of Olive Oil, then enter 3 or 3/0 as you prefer. For more information on the Unit Tab, click here.
9. As you fill in the Inventory Items, and their quantities, the Requisition Total at the top will show you the total dollar amount associated with this event.
Each Inventory Item will have an extension in the last column; the Requisition Total is the sum. Use this figure to cost the total of this requisition. If you are using this for catering, when the requisition is finished, it is the total for that party.
10.
To delete an Inventory Item, make sure the ![]() is
to the left of the item you want to delete. Click the
is
to the left of the item you want to delete. Click the ![]() button to delete the item.
button to delete the item.
A confirmation popup will appear. Click yes to delete the Item, click no to keep it on the Requisition sheet.
11.
You can Sort Inventory Items on the Requisition. To change
how you Sort the Inventory items, click the ![]() at the
end of Sort By. The Items will now appear alphabetically by the
Sort criteria.
at the
end of Sort By. The Items will now appear alphabetically by the
Sort criteria.
Sort by Item Name will show all items in alphabetical order. Sort by Location name will group all items by their location. You can use this to create pull lists for specific storerooms. Sort by Group Name will show all items alphabetically by their Group. Use this to see all what groups are associated with the Requisitions. If you want to offer choices, for example, coffee, tea and milk, use this sort feature to make sure all three are on the requisition. Prep Station lists the items alphabetically by their Prep Station. Use this sort to send raw goods to the proper area in the kitchen for production.

12.
To move between the different Sort areas, click the ![]() at the end. You can move between the different
names for each of the sort options and view the Inventory items below.
at the end. You can move between the different
names for each of the sort options and view the Inventory items below.
13.
To Print a Requisition log with today’s transactions, click the
![]() icon. The Print Preview will appear
on the Screen. Click on the
icon. The Print Preview will appear
on the Screen. Click on the ![]() to send it to the
Printer.
to send it to the
Printer.
Print the Requisition to use it as a Pull Sheet. If you save the Requisition, you can print it from the Inventory Reports section. For more information on Reports, click here.
14.
If you are called away while entering in the transactions, click
![]() to suspend the transaction. When you come
back, click Inventory, click Requisitions to have the suspended transaction
reappear.
to suspend the transaction. When you come
back, click Inventory, click Requisitions to have the suspended transaction
reappear.
If you create a generic Requisition such as “bar supplies” keep a suspended copy as a template.
15.
To send the Requisition to the Shopping Cart, click the ![]() button. A confirmation popup will appear.
Click Yes to add the items to the Shopping Cart.
button. A confirmation popup will appear.
Click Yes to add the items to the Shopping Cart.
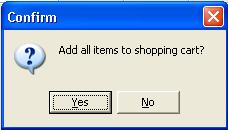
CostGuard will add the items to the Shopping Cart. A blue progress bar will appear in the lower right hand side. If you have a large Requisition, it may take a moment or two. When CostGuard finishes sending the information to the cart, you will see the following popup
Click OK to confirm. To finish the Order, save the Requisition and exit this screen. Open up the Shopping Cart to complete the Ordering process. The Inventory Items that you ordered will appear in the Shopping Cart. For more information on the Shopping Cart, click here.
16.
When finished, click the ![]() icon to save the
Requisitions.
icon to save the
Requisitions.
17. To view Saved Requisitions, go to the Requisition Journal. Click Inventory, click Reports, click Journals and click the button in front of Requisition Journal.
The Requisition Journal will show all Inventory items in saved Requisitions. For more information on this Report, click here.
18. Requisitions affect several Reports. They will appear on the Usage Reports as a depletion of Inventory. The Inventory Items requisitioned will affect the Reorder Reports. And, they may affect the Alert Reports.
For more information on Reports, click here.
To read more about Requisitioning items from a Recipe, click here.
To read more about Transfers and the Multi-Unit Controller, click here.
Continue regular path