
Tips
The Admin person has all powers. Choose your Admin person carefully, as they can do anything within the system - including adding employees and changing rights. You can always create a Group called General Manager and give that role most of the Admin Rights for day-day operations.
To protect your information, CostGuard has a User Rights security feature built into the program. User Rights allows you to create employee groups based on their job titles and roles, and then assign those employees the ability to do certain things. For example, you can create a Work Group called Cooks, which allows you line cooks to access Recipes, Inventory information, and Requisitions. From those screens, they can adjust and print recipes, look for excess product, and start a shopping list. However, you can restrict their access to other sensitive financial information.
Once you create a Group, it will be available in each unit. However, you must attach rights to each group in each unit that you have. The employee can still use the same login ID and password for each unit.
Since every establishment is unique, no one combination of rights works for all job descriptions. Below is a suggested hierarchy list.
Admin: this person in CostGuard has access to all rights.
General (Senior Unit) Manager: access to all transaction rights, no access to system options.
Chef (head cook): access to all inventory, and recipe managers. Create and suspend ordering, requisitions, HandGuard, Bids. Print Inventory Journals, Usage, and Alert Reports. Access to all Recipe operations, including creating and deleting recipes. Access to Sales Reports.
Bookkeeper: access to all Reports, suspended rights to Entering Orders, Bids, Requisitions, Transfers, and Receipts.
Human Resources: access to new employee log-on and create passwords.
Cooks: Access to Inventory Journal Report, access and suspend requisitions, access and suspend orders, access Recipes. Access to Sales Reports.
Servers (Wait Staff): Access and suspend Requisitions, Access to Bibliography and Notepad.
You may want to work with you Accountant and legal council to develop a working rights system that allows access to key areas based on job description.
This Security feature also allows access to a screen: an employee can look and make changes that CostGuard will not save. It also allows a user to enter information and suspend a transaction, such as a bookkeeper entering in Receipts that a manager will review later. You can also change User rights temporarily for vacation and sick day coverage, and then change the rights back.
To use this feature, first determine your groups and their access rights. Then go back and enter specific employees.
To Create Work Groups:
1. Until you change this, only the ADMIN login can do this. Click Configuration, click User and Security Configuration
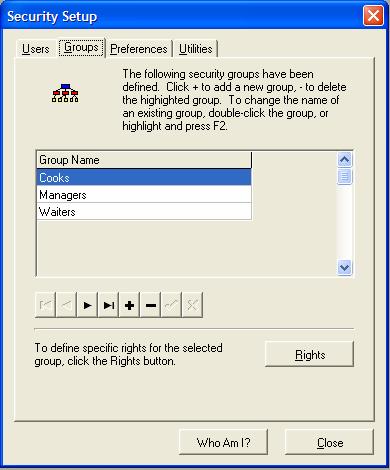
The Users Screen will appear. Later, when you add employees, you will do it from this screen. To create Groups, click the Group Tab. Later, you can change this right so that a general or senior manager can create or modify groups.
2. The Group Screen will appear. To start you off, CostGuard has entered three general levels of employees: Cooks, Managers, and Waiters. We did not give them any Rights, so you may wish to modify them.
3.
To change one of the three existing groups, use your mouse to highlight
it. Click the ![]() button.
button.
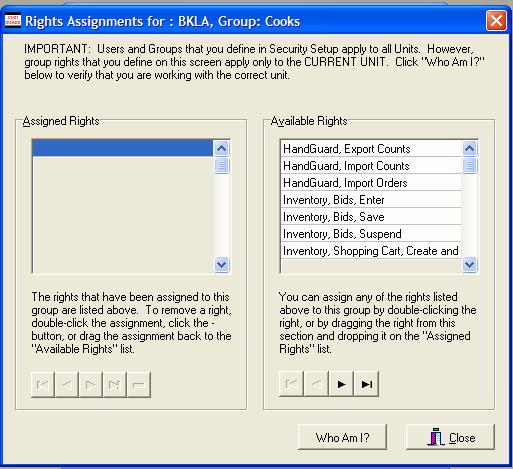
CostGuard divides into two sections: Assigned rights on the left and available rights on the right. To add a right to the Assigned section, double click it, and it will move to the left window. If you have a right in the left window, and change your mind and want it out of this group, then highlight it and double click it back. As you scroll down the list of available rights, notice that CostGuard divides transactions. You can have an employee access a screen and use it. The next right on the list is Suspending, where the employee’s work is suspended, and not used in reports or other calculations. The third level of rights is Saving, where an employee can enter information and save it, affecting reports and other activities in CostGuard. Since Work Group assigns Rights, all employees in this category will have the same level of access. Think through a typical day for this employee classification and decide what access they will need. If in doubt, allow them to access, and suspend, and have Save available for senior management only. When finished, click Close. You can come back later, and add or delete rights to Work Groups as needed.
4.
To add a Group, click the Groups Tab. Click the ![]() at the bottom. A blank line will appear.
Next, you can type in the name of the group. Click the
at the bottom. A blank line will appear.
Next, you can type in the name of the group. Click the ![]() to save the Group. Then click the
to save the Group. Then click the ![]() button to create the rights for this group.
button to create the rights for this group.
If you want to delete a group, then highlight
the category and click ![]() button.
button.
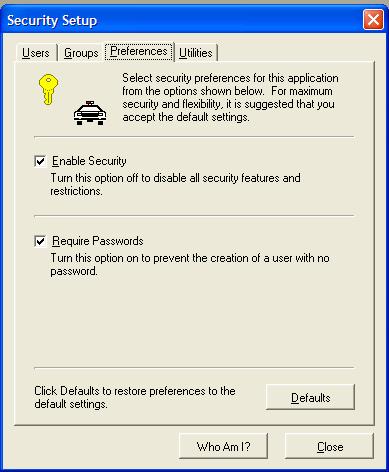
5. To change your Preferences for Users Rights and Security, click the Preference Tab. CostGuard set the default with both boxes checked. If you wish to change the option, unclick the box.
If you uncheck the first box, then CostGuard will reset the system so there are no User Rights and Access. Only choose this option, if you the owner, or decision maker is the only one using the program. If you have employees, you should keep this box checked and restrict access to sensitive areas. If you uncheck the second box, you can create User Logins without passwords. Again, you should leave this box checked, as someone can cause damage by using another person’s login name, and security access. If you change the options, click the Defaults button to return them to the original settings.
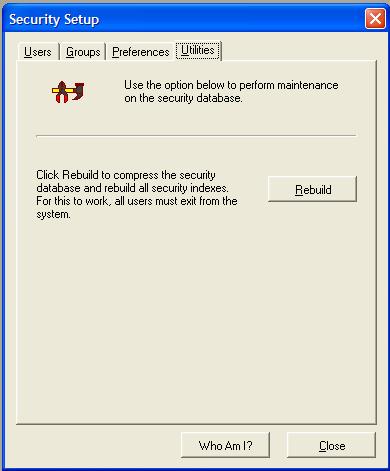
6. The Utilities Tab contains the Security Rebuild Function. Use this if your login and security features are not working correctly. It will rebuild the database.
7.
At anytime in this window, you can click the ![]() button.
This button shows who you are and what rights you have. It also
shows the current unit you are in.
button.
This button shows who you are and what rights you have. It also
shows the current unit you are in.
You can also see this information at any time by clicking Help, and then Who am I. If you would like to know how to switch users, click here. To go to Add Users (Employees) click here.

Continue regular path